
Unit 3: Trig Basics
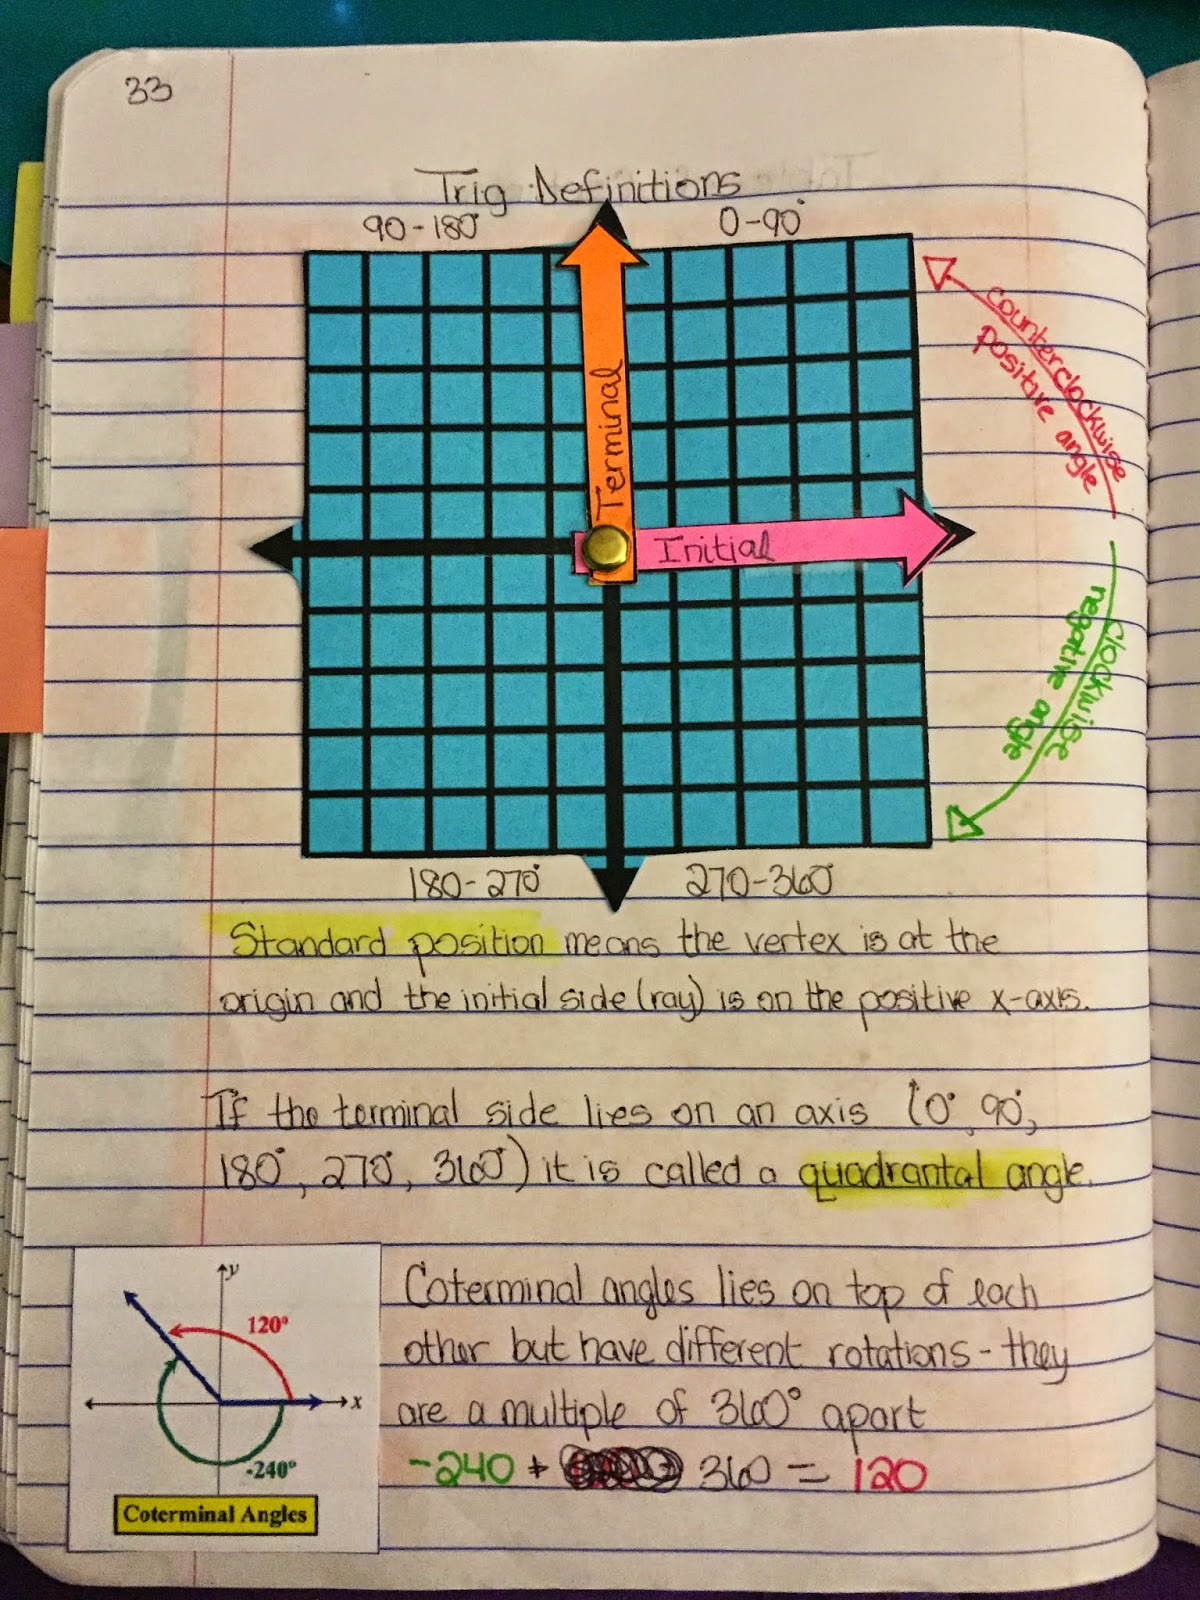
pg 33 We made our angles with a fastener and taped down the initial side so that we could move the terminal side around and demonstrate how it can go clockwise, counterclockwise, and more than one rotation.

pg 34 We color coded our examples with our red and green on the LHP signifying clockwise and counterclockwise.

pg 35 First we did this radian investigation modified from here. Then I used Shireen's awesome slices of pi idea to help students understand positive and negative angles related to radians and fractions.

pg 36 Students were given what is written in purple (again from Shireen) and had to fill in the missing pieces. We practiced drawing and these used their slices to determine the correct answers. I never told them how to convert.

pg 37-38 I hit reference angles really hard and broke it down as much as I could. It was tedious at the time but now students can do it in their head without any trouble. This is how I talked them through it so I just made it into a chart.


pg 39- 40 I used this graphic and listed the steps on the LHP. On the RHP they practiced the steps. We also did a lot of in class practice. I printed out a unit circle and put it in a page protector and we practiced over and over with dry erase markers. They liked the ordered pair problems much better.

Here are the files:
I used this activity and my students had a good time. It's great to refer to continuously throughout a unit. It worked well for my SPED, beginner trig students and more proficient ones too! I'm glad I took the extra time to have them make the manipulative. Thanks! "Team work makes the dream work". :)
ReplyDeleteThanks for the feedback!
Delete